Complete SEO Guide for Magento eCommerce Websites
eCommerce SEO
Complete SEO Guide for Magento eCommerce Websites
Anyone running or thinking of running an enterprise eCommerce has heard of Magento Commerce, WooCommerce and Shopify.
According to their website, Magento has more than a quarter of a million merchants around the world using it as their platform of choice.
Having provided eCommerce SEO services for many brands, we understand how it works and what’s needed to get results.
There are two Magento product lines: Community Edition (CE) and Enterprise Edition (EE). The former is a free open source CMS whereas EE is the premium and paid version (license fee starts from $22,000 per year).
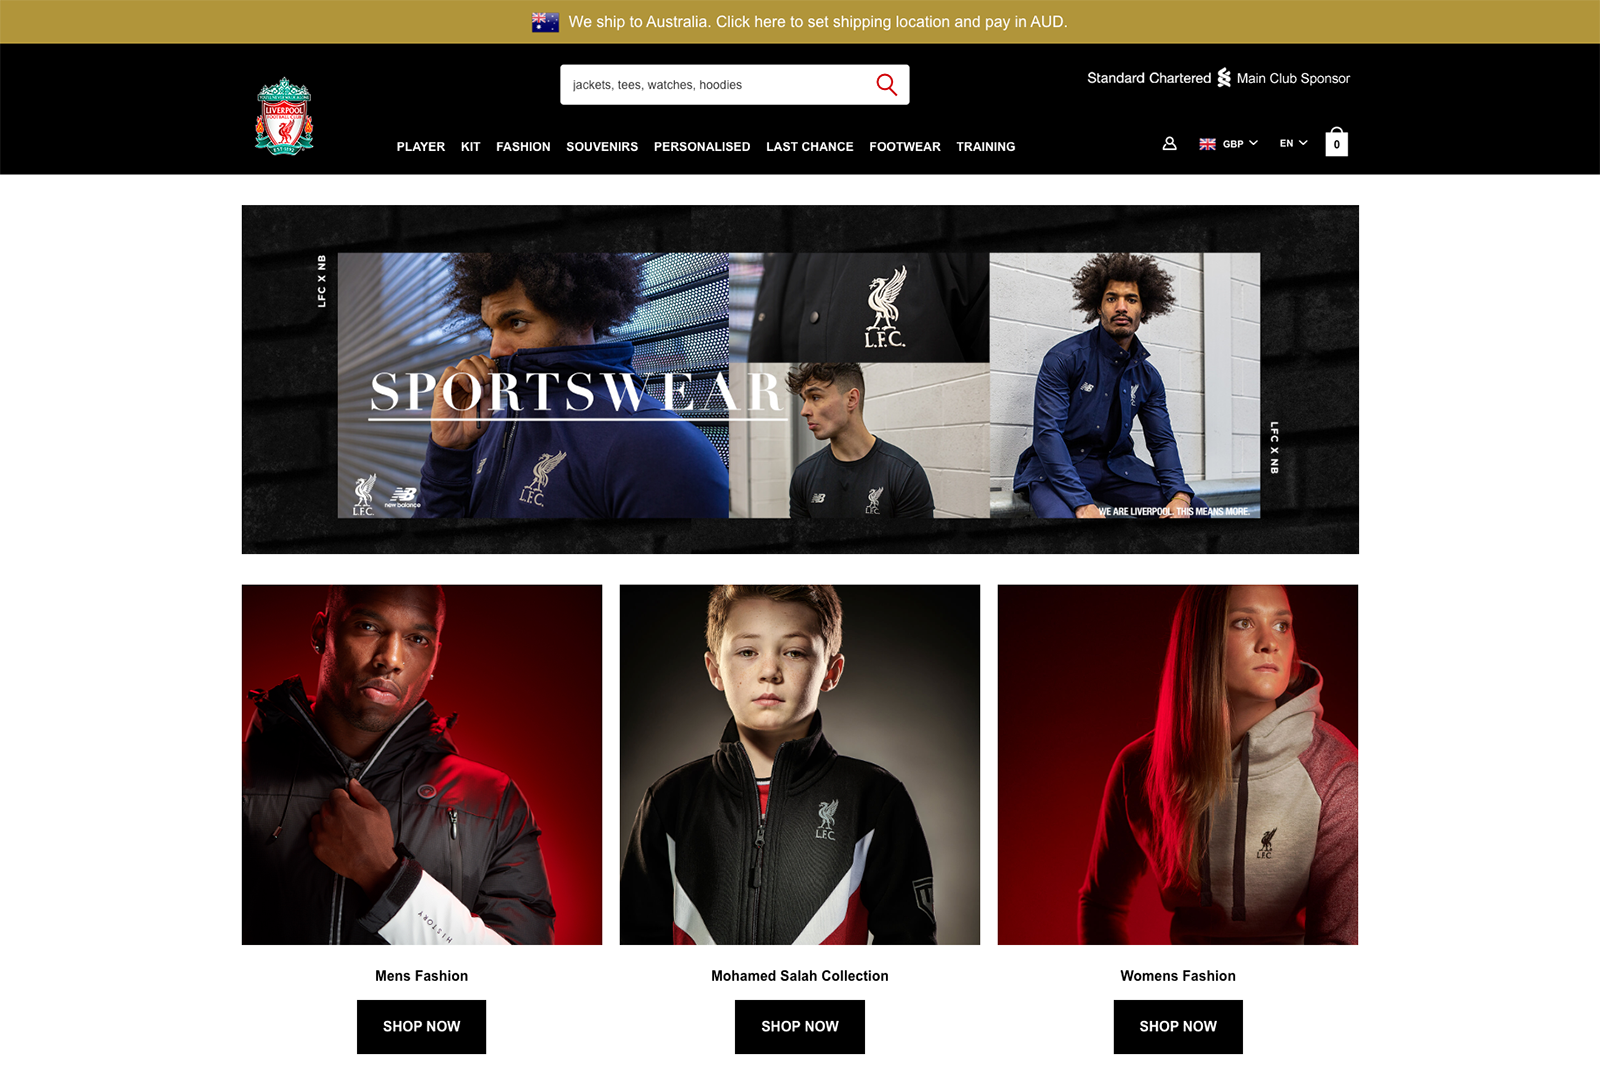
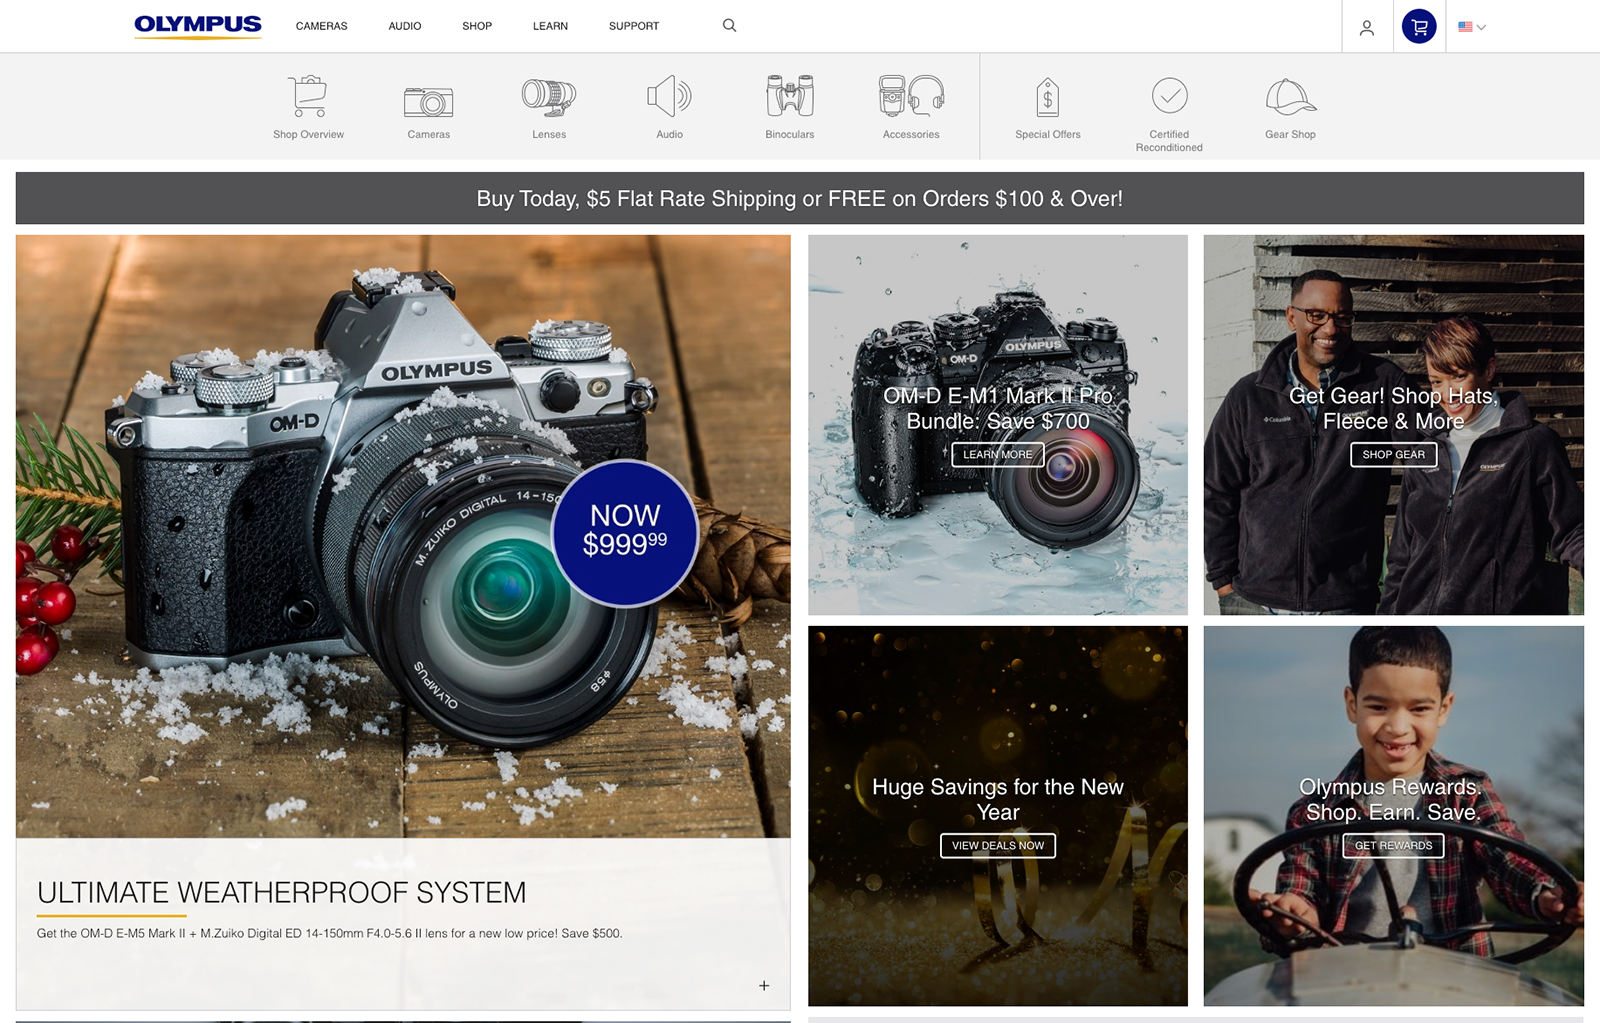
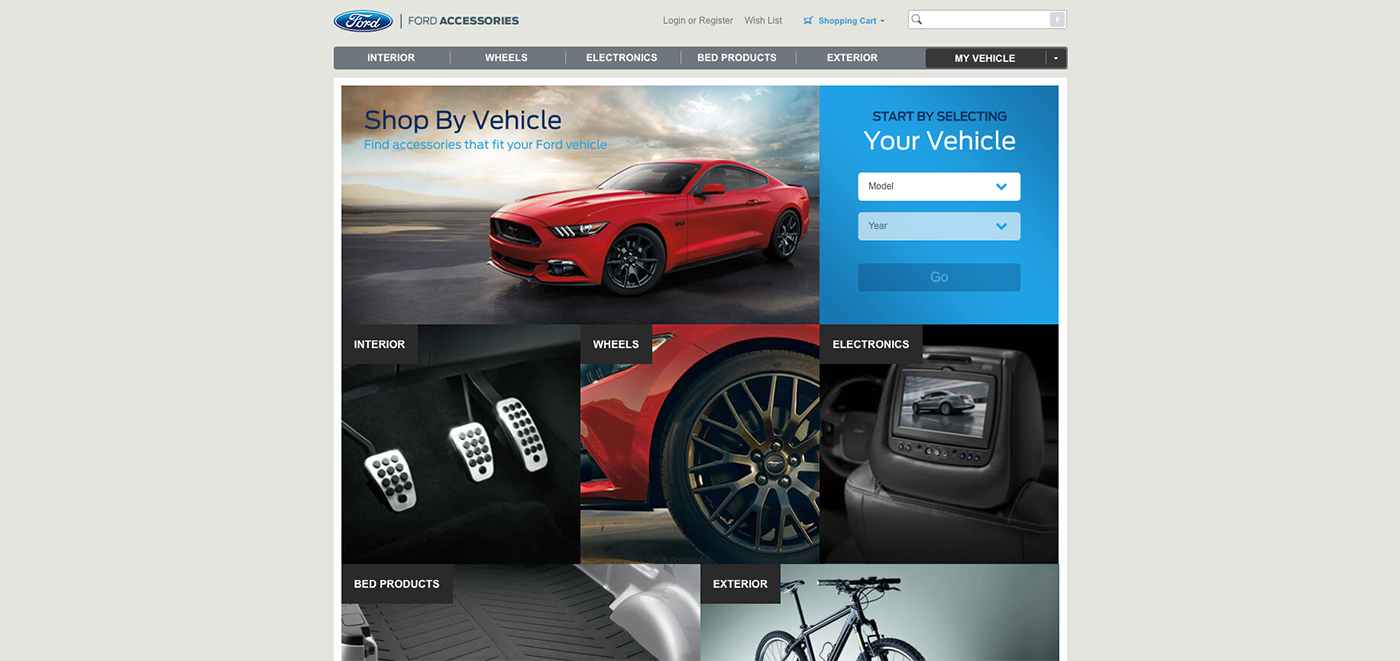
If you’re running Magento, you’re in good company because we’re pretty sure that you have heard of these companies: Land Rover (2.x), American powerhouse Ford Motors (1.x), luxury brand Christian Louboutin (1.x), Japanese camera and optics manufacturer Olympus, fashion brand Paul Smith, wristwatch maker Omega (2.x), and for the football (we call it Soccer downunder) fans, Liverpool FC.
Liverpool FC – built on Magento
Magento 1.x Versus Magento 2.x From An SEO Perspective
With over 15 releases and updates since the very first beta in 2007, knowing the version of Magento your website is running on is very important because each version has its pros and cons that can directly affect load times, security and conversions.
To find out which version of Magento your website is running, refer to your Magento Admin Backend and scroll to the bottom of the page in the Magento Admin Footer. The version number can be found in the centre of the footer.
Find out your Magento version using magentoversion.com
Alternatively, paste in your site URL into magentoversion.com. This free tool works for both CE and EE versions.
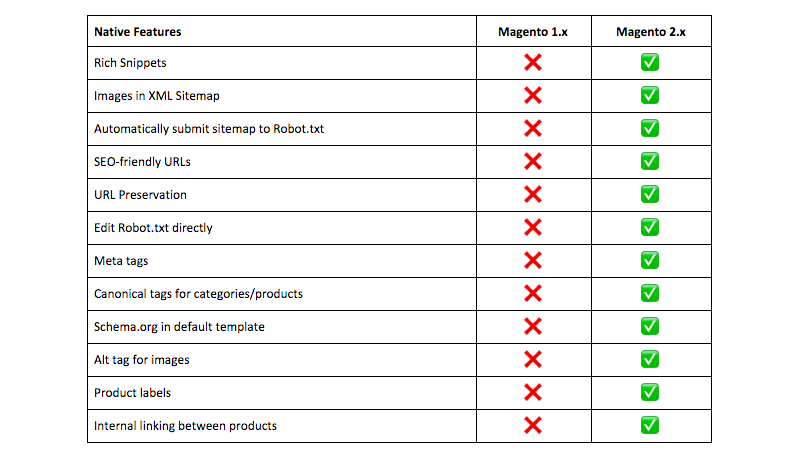
Many basic on-page SEO features on Magento 1.x versions required external extensions (free and paid). With the release of Magento 2, many of these features were finally introduced natively to the CMS.
Outside of on-page SEO features, Magento 2 offers out-of-the-box improved page loading times by using Ajax add-to-cart, minimised JS, Varnish cache and PHP7 support.
The goal of every eCommerce site is to make sales. SEO helps increase product visibility in searches as well as improve click-through rates (CTR).
Recommended reading: Ecommerce content marketing strategy: a step-by-step guide
Recognised as the Best Agency in Australia at the 2018 SEMrush Search Marketing awards, we get our clients more traffic by building high-quality links to achieve more conversions.
Magento 2 is already very SEO friendly but to help you get the most out of your Magento 2 site, we’ve put together a list of advanced Magento 2 technical on-page SEO settings to get your store and products more visibility.
In this article, we will be covering 13 Magento best practice SEO techniques:
- HTTPS
- Enable URL rewrites
- Enable caching
- Enable flat catalog
- Merge and minify JavaScript and CSS
- Setup Canonical tags
- Customise meta tags for target keywords
- Optimise meta tags for product pages
- Optimise images
- Invest in a blog
- Integrate Schema.org for product pages
- Implement Hreflang tags
- Build internal linking opportunities
- Build out a eCommerce link acquisition strategy
1. HTTPS
Apart from the fact that every eCommerce site should encrypt its data (usernames, passwords, payment processing), Google began using HTTPS as a ranking signal since 2015. As such, your Magento store must have a Secure Socket Layer (SSL) certificate.
An active SSL certificate ensures that all website traffic between your Magento server and customer’s browser is secure and cannot be read. An active SSL certificate enforces the application protocol to change from HTTP to HTTPS.
SSL certificates range in price and security and when deciding to choose an SSL certificate provider, you should include the following factors in your decision process: brand, validation type, issue time, domains included, service licensing, supported browsers, compatibility with mobiles, site seal, trust level and warranty.
Once you have purchased an appropriate SSL certificate, you may install it onto your Magento CMS server.
Similar to Magento 1.x, setting up Magento 2.x to work via HTTPS is relatively easy.
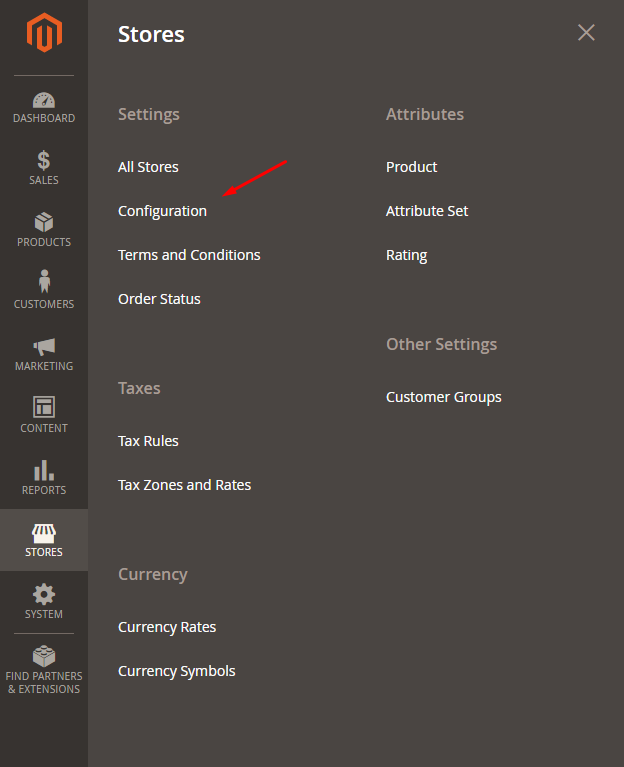
Simply go to Admin Panel > Stores > Configuration > Web.
Then expand the Base URLs (Secure) section and change the URL in the Secure Base URL field to https://yourdomain.com.
Once done, clear the Magento cache for the changes to apply.
2. Enable Web Server Apache Rewrites
Magento by default uses URL rewrites to remove the file name “index.php” that normally appears in the URL. The rewrite removes words that convey nothing of value to search engines and human eyes. This is one way of achieving SEO-friendly URLS.
Too enable URL rewrites in Magento, go to Admin Panel > Stores > Configuration > Web then expand the Search Engine Optimization section.
Set Use Web Server Rewrites to ‘Yes’.
When complete, tap Save Config.
But that’s not all.
Did you know that your Magento store can be configured to automatically generate a permanent redirect whenever the URL key of a product changes?
To set up automatic redirects, go to Admin Panel > Stores > Configuration > Catalog then expand the Search Engine Optimization section.
Set Create Permanent Redirect for URLS if URL Key Changed to ‘Yes’.
Click Save Config to complete the process.
3. Enable Caching
Page load times plays a significant role in user experience and is one of many Google ranking factor. Broadly speaking, caching is a snapshot of a webpage. Caching matters for an eCommerce store because adding more data (e.g., products) requires more backend requests and overhead. More overheads often leads to slower page loads.
Magento 2 has more than ten types of cache types, access them by going to Admin Panel > System > Tools > Cache Management.
Magento 2 has many cache types to choose from (and optimise)
4. Enable Flat Catalog
By default, Magento stores catalog data in multiple tables based on the Entity-Attribute-Value model. Since product attributes are stored in many tables, SQL queries are sometimes long and complex leading to slow performance.
In contrast, a flat catalog creates new tables on the fly, where each row contains all the necessary data about a product or category. Flat catalog indexing can improve the speed of processing catalog and cart price rules.
Before you enable a flat catalog for a live store, make sure to test the configuration in a development environment.
To enable the flat catalog in Magento 2, log in to the the Admin Panel and go to Stores > Settings > Configuration.
In the panel on the left under Catalog, choose Catalog.
Expand the Storefront section then do the following:
Set Use Flat Catalog Category to ‘Yes’. If necessary, clear the Use system value checkbox.
Set Use Flat Catalog Product to ‘Yes’.
Click Save Config to complete.
When prompted to update the cache, click the Cache Management link in the system message, and follow the instructions to refresh the cache.
To verify the results, refer to Magento documentation.
5. Merge + Minify JS
Minifying and merging JS and CSS into fewer files and compressing them can reduce page load times and improve general performance for your store.
To merge CSS files in Magento 2, log into the Admin Panel and go to Stores > Settings > Configuration.
Select Developer under Advanced in the panel on the left.
Open the CSS Settings section (shown below).
In the Merge CSS Files field, choose ‘Yes’ then click Save Config to finalise the process.
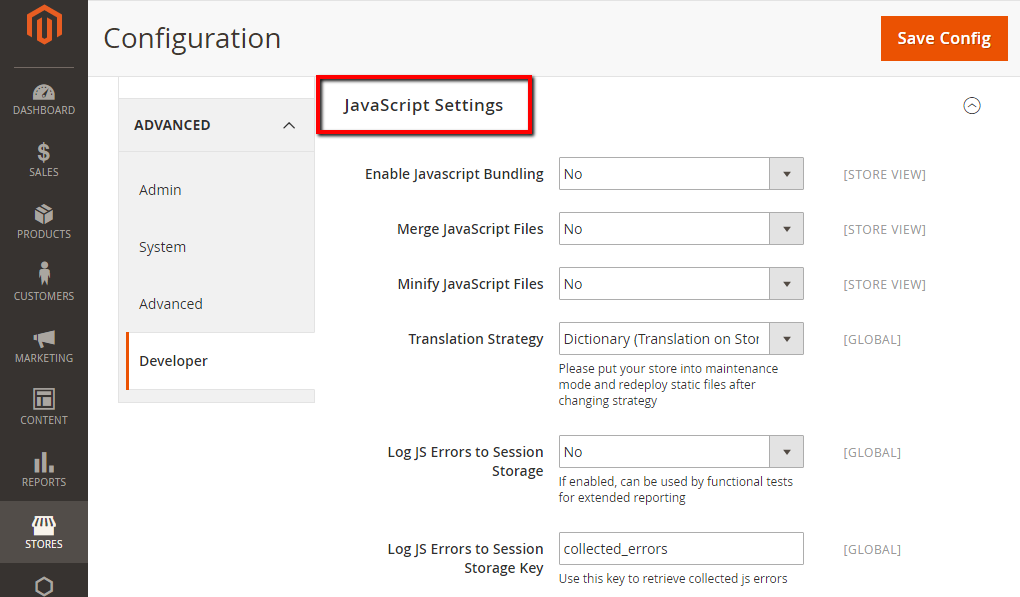
To merge JavaScript files in Magento, follow the above steps to navigate to the Developer tab.
Open the JavaScript Settings section (see below).
In the Merge JavaScript Files field, select ‘Yes’ then click Save Config to complete the process.
6. Setup Canonical Tags to Prevent Duplicate Content Penalties
Many eCommerce businesses use manufacturer-supplied product descriptions. Chances are, if you’re using the same product description, others are (probably) as well. Duplicate content is one of the most common SEO issues, in particular, for eCommerce websites.
Google defines duplicate content as:
“Duplicate content generally refers to substantive blocks of content within or across domains that either completely match other content or are appreciably similar. Mostly, this is not deceptive in origin. Examples of non-malicious duplicate content could include:
Discussion forums that can generate both regular and stripped-down pages targeted at mobile devices
Store items shown or linked via multiple distinct URLs
Printer-only versions of web pages.”
In April 2011, Google launched their first Panda algorithm update targeting duplicate content. From their perspective, Google prefers to offer their users within unique content. When Google sees pages with duplicate content, it will group them into clusters and serve only the best result from said cluster. That is, whilst Google does not explicitly penalise websites for duplicate content, your website may be omitted from search results completely. With no visibility comes no traffic and ultimately, no sales.
What is the best solution for solving the duplicate content problem on Magento?
There are typically three methods to tackling duplicate pages: 301 redirect, 302 temporary redirect, or canonical URLs. Of these three, canonical URLs carry the most advantageous benefits.
A canonical URL refers to an HTML link element, with the attribute of rel=”canonical”, found in the <head> element of your webpage. It specifies to search engines such as Google your preferred URL.
To set canonical URLs in Magento 2, log in to the the Admin Panel and go to Stores > Settings > Configuration.
Next, expand the Catalog drop-down menu and choose Catalog. Then open the Search Engine Optimization section. It will look like this (you will be making changes to the last two fields):
To request search engines to index only pages that have a full category path:
Use Canonical Link Meta Tag for Categories – ‘Yes’;
Use Canonical Link Meta Tag for Products – ‘No’;
To request search engines to index only product pages:
Use Canonical Link Meta Tag for Categories – ‘No’;
Use Canonical Link Meta Tag for Products – ‘Yes’;
To request search engines to index both categories and products:
Use Canonical Link Meta Tag for Categories – ‘Yes’;
Use Canonical Link Meta Tag for Products – ‘Yes’;
7. Customise Title Tags to Include Target Keyword
Your page title is the primary text a user sees when they perform a Google search and read the results. Resist the temptation to front-load your brand name in the page title. Instead, place a targeted keyword at the beginning of each title tag.
What keywords should your eCommerce store target? Have a read of ‘Keyword research tools you should be using’.
As a general rule of thumb, title tags should not be more than 70 characters in length and should be unique (i.e., do not repeat title tags across multiple pages). The best way to map your store’s title tags is to populate a spreadsheet with columns detailing the title tag used for each specific URL.
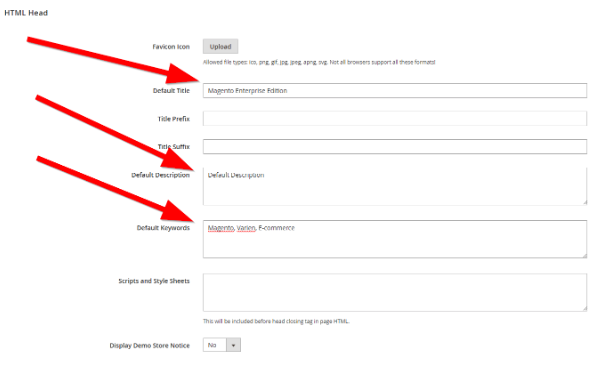
To customise a page’s title tag in Magento 2, go to Admin Panel > Content > Design > Configuration. Scroll down until you see the following sections.
Replace the ‘Default Title’ field with your preferred text making sure that you are using a primary keyword in the page title.
While you’re here, delete the pre-populated text in ‘Default Keywords’ field.
8. Use Appropriate Meta Tags for Product Pages (And Write Better Product Descriptions!)
Meta data is your store’s first level of contact with a potential customer. Search engines pull meta tags to display page titles and page description in their search result pages.
Best practice SEO when it comes to meta tags for product pages is to have a unique meta description for each URL. Magento 2.
For those of you who already have a Magento store, use Screaming Frog SEO Spider Tool & Crawler Software to see your current meta tags (page titles, H1-H3 tags, meta descriptions). Pull the data into a spreadsheet to identify specific pages to target. Understandably, your eCommerce store may have thousands of products and the task of mapping out unique page titles and meta description will be a tedious one. Our suggestion is to identify your top selling products and prioritise your time targeting pages that will produce results.
In order to add or modify meta descriptions within Magento 2, go to Admin Panel > Products > Catalog then select an existing product.
Your product will have a Basic Settings panel in the dashboard, click Search Engine Optimization. The resulting settings panel is where you will be adding meta tags, specifically the Meta Description field. Be sure to leave the Meta Keywords field blank as meta keywords are no longer relevant and search engines such as Bing interprets meta keywords as a penalty factor.
How long can a meta description be?
How long should your meta description be?
As a general rule of thumb, your eCommerce store page and product meta descriptions should be between 680 – 920 pixels which often translates to a count of 120 – 158 characters. This will avoid search engines cutting off your meta descriptions (which may have a negative impact on CTR).
Once again, you can use the Screaming Frog tool (linked above) to crawl for existing meta description length and make modifications as necessary.
Do keywords matter in meta descriptions?
While keywords in meta descriptions are not a ranking signal, having the primary keyword towards the beginning of the meta description will help your CTR.
9. Optimise Images
Nobody likes to wait and when it comes to a potential customer, a matter of seconds can make the difference between them leaving your website or completing a purchase on your store.
Product images are crucial to an eCommerce store and considering that images typically take up 60% of the average bytes loaded per page, large and unoptimised images play a significant role in slow page loading times.
You should always be uploading exact dimensions to your server.
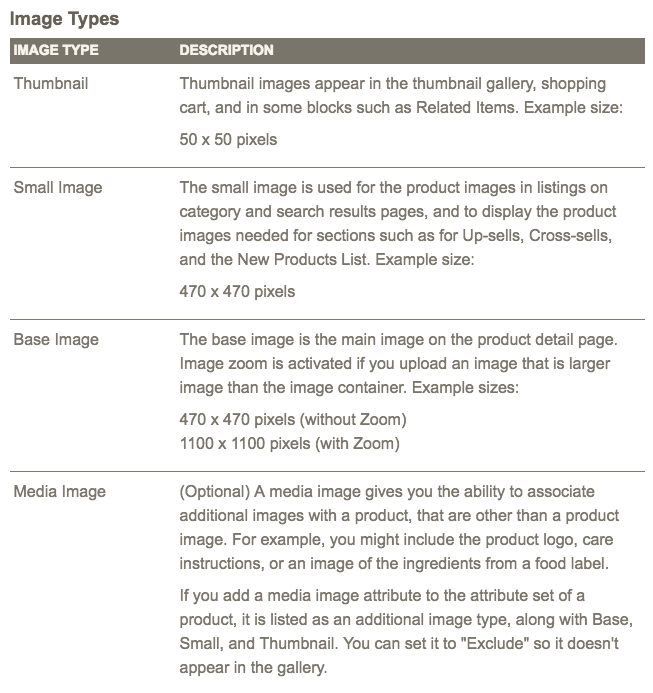
Since the base image in Magento 2 is 1100 x 1100 pixels (with zoom), your product images should be in a 1:1 aspect ratio (square) and be exactly 1100 pixels wide and 1100 pixels in length. Alternatively, if you do not want image zoom, upload images that are 470 x 470 pixels.
But size isn’t everything when it comes to SEO image optimisation.
Image SEO starts with the file name. A product image with a file name of “DSC00251.jpg” doesn’t tell Google anything useful but “dog-keychain-14k-gold.jpg” tells Google what the product is.
Secondly, all images should have individual alt-tags that describe the featured product because search engines cannot read images.
A final step of image SEO is to compress the image file size using a third-party app such as ImageOptim, TinyPNG, and Kraken.
10. Invest in a Blog
Blogging, that is, publishing valuable content is an important aspect to SEO.
Publishing valuable content not only keeps your website updated but allows you to create more pages which in turn, allow your store to target more relevant keywords. By utilising internal linking, you can keep a visitor on your store for longer which may influence them to add something to cart and make a purchase.
Magento does not offer blog functionality by default. Therefore you will need to use a custom extension for it. Magento Marketplace has a list of blogging extensions ranging from free to paid for you to choose from.
11. Integrate Product Reviews, Price, Image with Schema.org
Schema is structured data collaboratively developed with Google, Bing, Yandex and Yahoo! to make search engines understand website content easier and thus, provide better SERPs.
Rich Snippets is the term used to describe structured data markup that may be added to existing HTML to help search engines better understand the provided information.
Where normal search results do not stand out, having Rich Snippets attached with a search result produce eye catching results, increased visibility and can improve CTR. Another advantage to having a good set of markup Schema in competitive keywords is that it will increase the screen real estate the SERP occupies.
Magento 2 allows Structured Data configuration on product pages by default. That is, there is no longer a need for external extension although you may wish to consider third party solutions for advanced configurations.
Schema markups available to products by default in Magento 2 are:
- AggregateRating
- Offer
- Image
- SKU
- Product name
Once structured data has been implemented, use Google’s Structured Data Testing Tool to verify and to identify if there are any errors.
12. Implement Hreflang Tags
Using Hreflang tags is critical for eCommerce stores that wish to serve customers from multiple geographical regions. Implementing Hreflang attributes does not increase traffic but rather, helps serve the right content to the right users. The Hreflang attribute is crucial to avoid search engines interpreting multiple pages as being duplicate in nature. This differs from Canonicalization.
The hreflang attribute can be placed in 3 ways (but only choose one): on-page markup, HTTP header, or via the sitemap.
Multiple third party extensions (available on Magento Marketplace) exist that make implementing Hreflang tags on your Magento 2 store without coding needs.
13. Build Internal Linking Opportunities
As we mentioned earlier, internal linking is vital to SEO. Not only does it improve the indexation of your online store, internal linking provides value to your customer.
An internal link connects one page of your website to another page of your website. For your eCommerce store, the easiest way to implement this is by recommending related products through cross-selling or up-selling.
To do this in Magento 2, first go to Catalog > Products.
After selecting an existing product, go to Related Products, Up-Sells, and Cross-Sells > Related Products > Add Related Products.
14. eCommerce Link Acquisition Strategy
The next important step with growing traffic on a Magento site is to ensure you have a solid link acquisition strategy in place to further grow your SEO traffic.
Some Magento link acquisition tips include –
– Securing links from partners who work with you, this can involve reaching out to partner websites and asking for a link on a partners page.
– Completing link acquisition using resource page based links found on Ahrefs, for example this can involve finding relevant lists which your company is affiliated with.
– If you are a multi store eCommerce site with offline locations ask shopping centre locations for links on the local shopping website.
– Using tools like Ahrefs link intersect to review competitor links which they have currently acquired.
– Creating a great content asset which can be used as a linkable asset during outreach.
– Some further eCommerce link acquisition tips can be found here.
Looking for more help with Magento SEO?
The team at Prosperity Media has worked with numerous Magento SEO clients to help scale organic search traffic. If you have any questions about Magento SEO feel free to contact the team today.
